
Homemade caramel apples are a classic treat that bring together the crisp freshness of apples with the sweet, gooey goodness of caramel. The blend of crunchy fruit and smooth caramel creates a simple yet irresistible snack that’s perfect for fall or anytime you’re craving a little something sweet. The shiny, sticky caramel coating is what makes these apples stand out and feel extra special.
I love making these at home because you can customize them however you want—sprinkles, chopped nuts, or even a drizzle of chocolate add fun textures and flavors. Plus, dipping the apples in hot caramel is such a satisfying process. Just a heads-up: it can be a little messy, but that’s part of the fun! Watching the caramel harden around the apple feels a bit like magic.
One of my favorite ways to enjoy caramel apples is to slice them up once the caramel has set, making them easier to share and less tricky to eat. Whether it’s during a cozy weekend or at a festive get-together, homemade caramel apples always bring a bit of joy to the table. They’re a sweet reminder of simple pleasures, and I bet once you try making them yourself, you’ll want to keep coming back to this easy, delightful treat.
Key Ingredients & Substitutions
Apples: Tart apples like Granny Smith work best because their tangy flavor balances the sweet caramel. You can also use Fuji or Honeycrisp if you prefer a sweeter apple. Just make sure they’re firm and crisp.
Caramel base: Sugar, corn syrup, heavy cream, and butter create a rich, creamy caramel. If you don’t have corn syrup, you can substitute with honey or maple syrup, but this might change the texture slightly.
Nuts for coating: Chopped peanuts or pecans add a nice crunch. You can swap them for almonds, walnuts, or even crushed cookies. If you’re allergic or prefer nut-free, try colorful sprinkles or crushed pretzels.
How Do You Make Smooth, Perfect Caramel Without Burning It?
Cooking caramel can be tricky because high sugar can burn quickly or seize up. Here’s how to avoid that:
- Use a heavy saucepan for even heat distribution.
- Stir ingredients until boiling, then stop stirring to prevent crystallization.
- Attach a candy thermometer and cook until it reaches 245°F (118°C), the firm ball stage – this ensures a chewy, set caramel.
- Remove from heat quickly and add vanilla and salt for balance.
- Work fast dipping your apples while caramel is warm and smooth.
Taking your time to monitor temperature closely is key to silky caramel and great results every time.
Equipment You’ll Need
- Heavy-bottomed saucepan – I recommend this because it heats evenly, helping prevent burning and making it easier to cook the caramel to the right temperature.
- Candy thermometer – this is essential to know when your caramel reaches the perfect stage for a chewy, firm texture.
- Wooden spoon or silicone spatula – I like using these for stirring the caramel because they won’t scratch the pan and make mixing easy.
- Baking sheet with parchment paper or silicone mat – this provides a clean, non-stick surface for setting the apples after dipping.
- Chopping board and knife – for preparing nuts or other toppings, making sure they are ready for dipping.
- Apples with stems and wooden sticks – the sticks make dipping easier and give the apples a classic look.
Flavor Variations & Add-Ins
- Swap nuts for crushed cookies or sprinkles for a fun, colorful topping that kids love.
- Drizzle melted chocolate over the caramel apples after coating for an extra chocolatey treat.
- Add a pinch of cinnamon or a splash of bourbon to the caramel mixture for a warm, spiced flavor.
- Use different apple varieties like Fuji or Honeycrisp for sweeter, juicier bites.
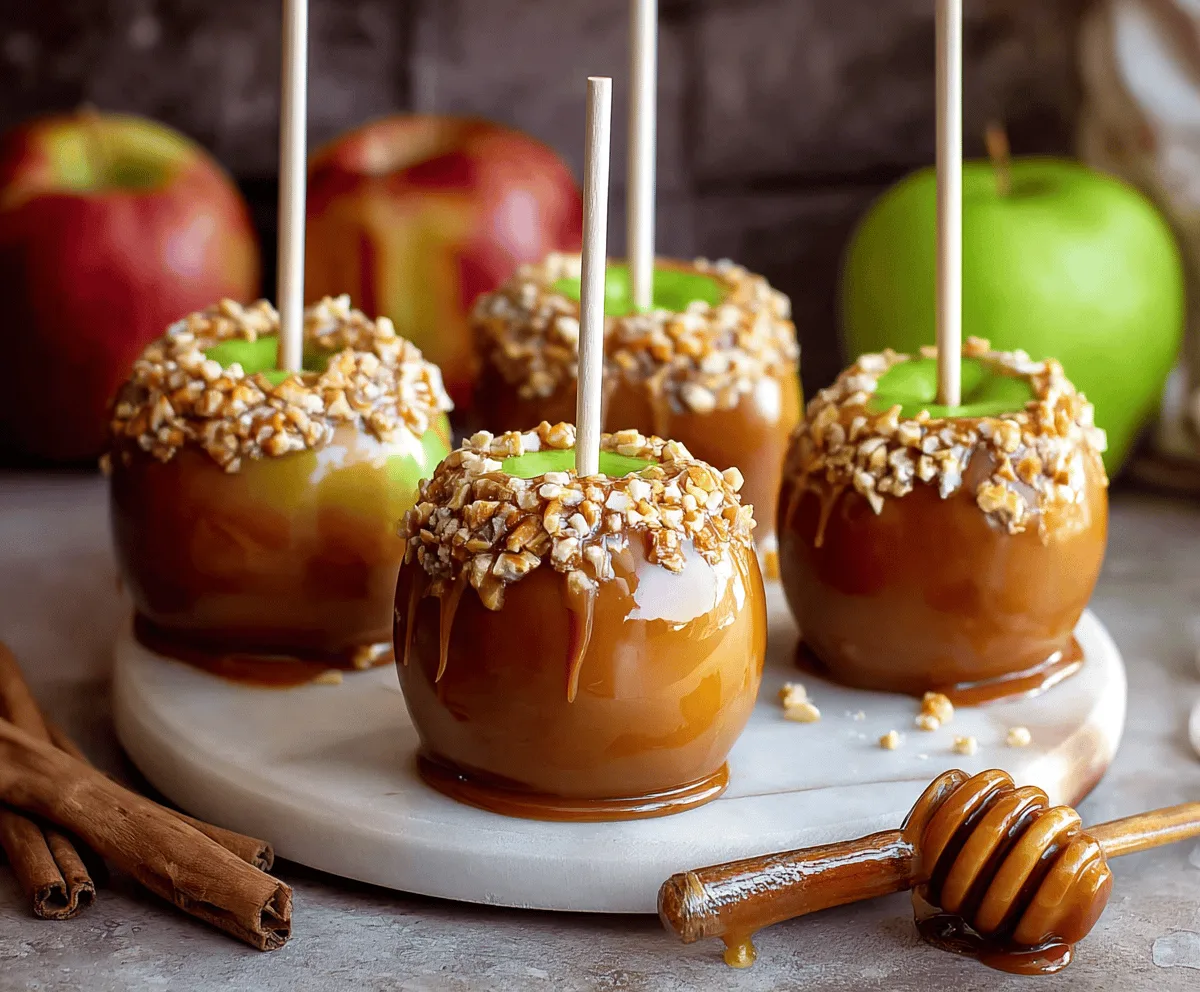
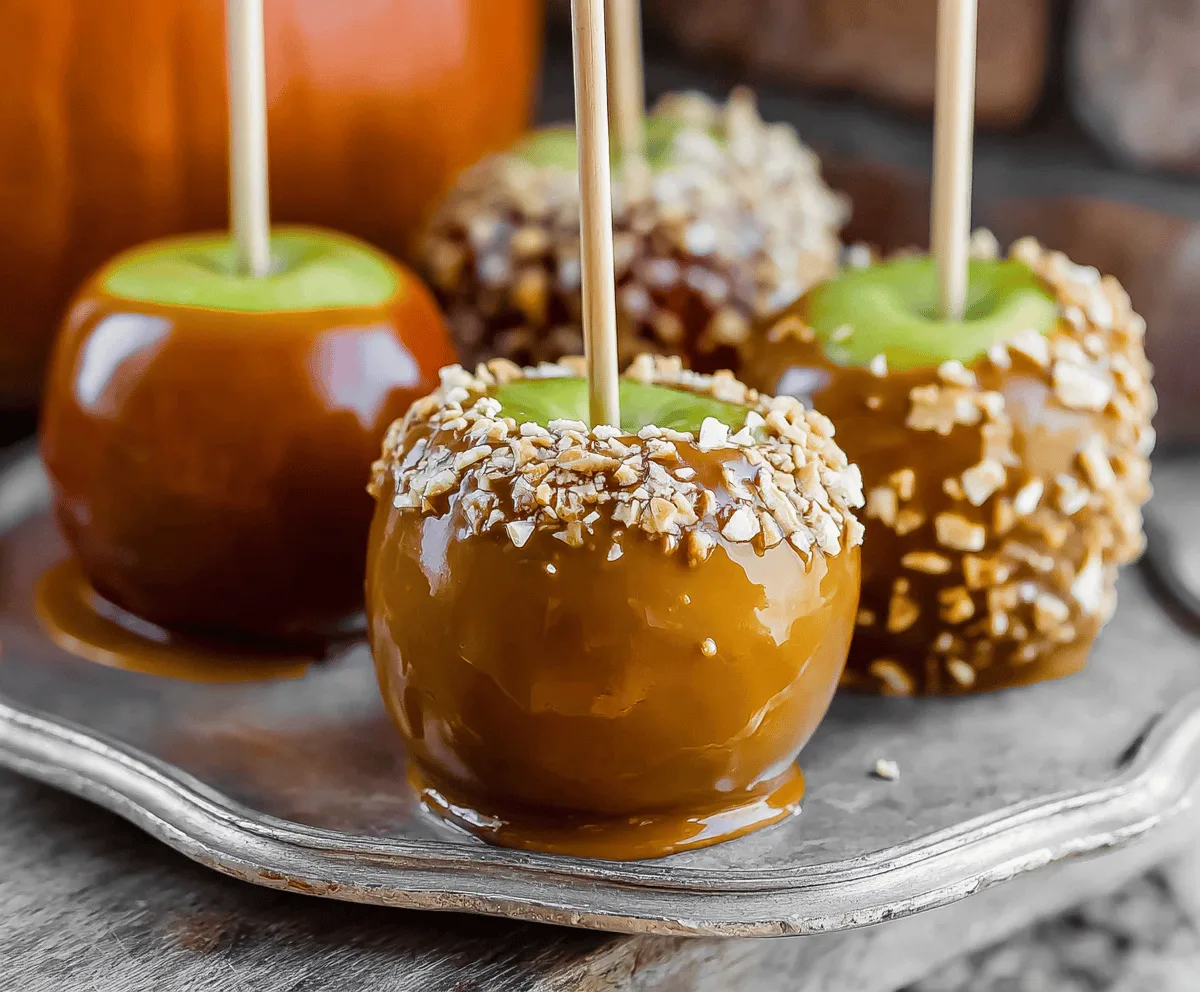
Homemade Caramel Apples with Nuts
Ingredients You’ll Need:
For The Apples:
- 4 medium Granny Smith apples (or your choice of tart apples)
- Wooden sticks for apples (craft sticks or popsicle sticks)
For The Caramel:
- 1 cup granulated sugar
- 1/2 cup light corn syrup
- 1/2 cup heavy cream
- 4 tbsp unsalted butter
- 1/2 tsp vanilla extract
- 1/4 tsp salt
For The Topping:
- 1 cup chopped nuts (such as peanuts or pecans)
How Much Time Will You Need?
Preparing these caramel apples takes about 15 minutes of active cooking and dipping time, plus around 30 minutes for the caramel to cool and harden on the apples. In total, expect to spend close to 45 minutes from start to finish.
Step-by-Step Instructions:
1. Prepare the Apples:
First, wash your apples thoroughly and dry them completely. Removing moisture helps the caramel stick better. Then, remove the stems and firmly insert wooden sticks into the top center of each apple. Set the apples aside.
2. Get Ready for Dipping:
Line a baking sheet with parchment paper or a silicone baking mat to prevent sticking. Place the chopped nuts in a shallow bowl or plate, ready for dipping once the apples are coated in caramel.
3. Make the Caramel:
In a medium heavy-bottomed saucepan, combine the sugar, corn syrup, heavy cream, and butter. Cook over medium heat, stirring frequently until the mixture comes to a boil.
4. Cook to the Right Temperature:
Attach a candy thermometer to the side of your pan. Continue cooking the caramel without stirring until it reaches 245°F (118°C), known as the firm ball stage. This ensures the caramel will set properly on your apples.
5. Flavor and Remove from Heat:
Take the pan off the heat and stir in the vanilla extract and salt, which enhance the caramel’s flavor perfectly.
6. Dip and Coat the Apples:
Working quickly, dip each apple into the warm caramel, swirling to cover the whole apple evenly. Let any excess caramel drip back into the pan. Next, immediately dip the caramel-covered apples into the chopped nuts, covering mainly the top edges for a rustic, nutty finish.
7. Cool and Set:
Place the dipped apples onto your prepared baking sheet and let them cool at room temperature for at least 30 minutes. The caramel will harden and hold the nut topping in place.
8. Serving and Storage:
Once the caramel sets, your delicious caramel apples are ready to enjoy! Store them in a cool, dry place, but avoid the fridge to prevent moisture from softening the caramel coating.
Can I Use Frozen Apples to Make Caramel Apples?
It’s best to use fresh, fully thawed apples if you have frozen ones. Thaw them completely in the fridge and pat dry to remove any moisture, which can prevent caramel from sticking properly.
How Should I Store Leftover Caramel Apples?
Store caramel apples in a cool, dry place at room temperature, ideally in an airtight container. Avoid refrigeration as moisture can soften the caramel and make it sticky.
Can I Substitute Corn Syrup in the Caramel?
Yes! You can use honey or maple syrup as a substitute, but the texture of the caramel may change slightly. Corn syrup helps prevent crystallization, so watch the caramel carefully if you swap ingredients.
How Can I Prevent Caramel from Pulling Off the Apples?
Make sure your apples are completely dry and free from wax or residue before dipping. Washing them with warm water and vinegar helps remove the wax coating, allowing the caramel to stick better.